Monday, October 19, 2015

Creating and Managing snapshot - Netapp

Guidelines for creating Snapshot copies of Infinite Volumes

  1. The volume must be online. You cannot create a Snapshot copy of an Infinite Volume if the Infinite Volume is in a Mixed state because a constituent is offline.
  2. The Snapshot copy schedule should not be less than hourly. It takes longer to create a Snapshot copy of an Infinite Volume than of a FlexVol volume. If you schedule Snapshot copies of Infinite Volumes for less than hourly, Data ONTAP tries but might not meet the schedule. Scheduled Snapshot copies are missed when the previous Snapshot copy is still being created.
  3. Time should be synchronized across all the nodes that the Infinite Volume spans. Synchronized time helps schedules for Snapshot copies run smoothly and restoration of Snapshot copies function properly.
  4. The Snapshot copy creation job can run in the background. Creating a Snapshot copy of an Infinite Volume is a cluster-scoped job (unlike the same operation
    on a FlexVol volume). The operation spans multiple nodes in the cluster. You can force the job to run in the background by setting the -foreground parameter of the volume snapshot create command to false
  5. After you create Snapshot copies of an Infinite Volume, you cannot rename the copy or modify the comment or SnapMirror label for the copy.

Guidelines for managing Snapshot copy disk consumption

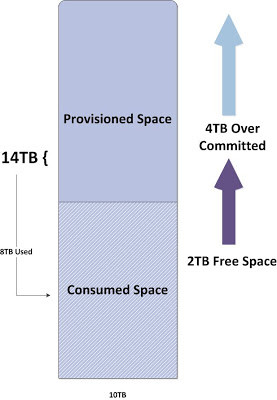
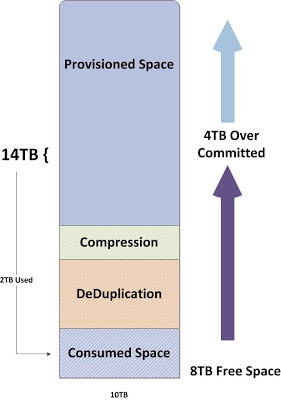
  • You cannot calculate the amount of disk space that can be reclaimed if Snapshot copies of an Infinite Volume are deleted.
  • The size of a Snapshot copy for an Infinite Volume excludes the size of namespace mirror constituents.
  • If you use the df command to monitor Snapshot copy disk consumption, it displays information about consumption of the individual data constituents in an Infinite Volume—not for the Infinite Volume as a whole.
  • To reclaim disk space used by Snapshot copies of Infinite Volumes, you must manually delete the copies.
You cannot use a Snapshot policy to automatically delete Snapshot copies of Infinite Volumes. However, you can manually delete Snapshot copies of Infinite Volumes, and you can run the delete operation in the background

Create Snapshots

Syntax: snap create [-A | -V] <volume name> <snap shot name>
ARK> snap create -V vol0 testingsnap          #### for volume level snapshot creation
ARK> snap create -A aggr0 testingsnap     #### for aggregate level snapshot creation
in above scenario ‘snap create’ is a command to create snapshot.
‘-V’ is a option to create snapshot in volume level.
‘vol0’ is the volume name.
‘testingsnap’ is the snapshot name.

Rename Snapshots

Syntax: snap rename [-A | -V] <volume Name> <Old-snap name> <New snap Name>
ARK> snap rename -V vol0 testingsnap realsnap     #### Renaming Volume level snapshot
ARK> snap rename -A aggr0 testingsnap realsnap #### Renaming Aggregate level snapshot

Snap reserve space

Syntax: snap reserve [-A | -V] <volume Name> <percentage>
ARK> snap reserve -V vol0       ### verify volume reserve snap percentage
ARK> snap reserve -V vol0 20      ### Change snap reserve space to 20%

Snap Delete

Syntax: snap delete [-A | -V ] <volume Name> <snapshot name>
ARK> snap delete -V vol0 realsnap      ####Deleting vol0 realsnap snapshot

snap reclaimable size

Syntax: snap reclaimable <volume name> <snapshot Name>
ARK> snap reclaimable vol0 snapshot1
snap reclaimable: Approximately 780 Kbytes would be freed.

Snap Restore

ARK> snap restore -V -t vol -s snapshot1 vol1
above command will restore entire volume. before restoration it will ask you for the confirmation.

snap autodelete

snap autodelete is the option we have to to delete old snapshots automatically.
ARK> snap autodelete vol1 show
ARK> snap autodelete vol1 on
ARK> snap autodelete vol1 off
Lets see all detailed explanation about snapshots


Please provide your valuable comments....

Saturday, October 17, 2015

Enable SSH from ESX to Netapp - Automation

SSH from ESX to Netapp

By default, the SSH configuration on VMware ESX Server only supports AES encryption types (specifically, AES-256 and AES-128). If you need SSH connectivity from ESX Server to a Network Appliance storage system running Data ONTAP, you’ll need to modify this to support 3DES.
This kind of connectivity would be necessary if you were interested in running scripts on ESX Server that connected to the NetApp storage system via SSH to run commands (for example, to initiate a snapshot via the command line).
To modify the ciphers supported by ESX Server, edit the /etc/ssh/ssh_config file and change this line:
ciphers aes256-cbc,aes128-cbc
Instead, it should look like this:
ciphers aes256-cbc,aes128-cbc,3des-cbc
This will enable SSH connections from ESX Server to find a compatible cipher with the SSH daemon running in Data ONTAP. Note that we change the SSH configuration on ESX Server because, as far as I know, the ciphers supported by the SSH daemon in Data ONTAP are not configurable by the user.
Note that you’ll also need to enable SSH traffic through the ESX firewall:
esxcfg-firewall -e sshClient
And, of course, you’ll need to configure and enable SSH access on the Network Appliance storage system itself using the secureadmin command in Data ONTAP:
secureadmin setup ssh
secureadmin enable ssh2
Once SSH is reconfigured on ESX Server and configured/enabled in Data ONTAP, then using SSH to run commands remotely from ESX Server to the NetApp storage system should work without any problems. For complete automation, you’ll also want to setup SSH shared keys as well, but I’ll save those details for a future article.

Calculating Usable and RAW Disk Space

Calculate usable disk space
You use the physical and usable capacity of the disks you employ in your storage systems to ensure that your storage architecture conforms to the overall system capacity limits and the size limits of your aggregates.

To maintain compatibility across different brands of disks, Data ONTAP rounds down (right-sizes) the amount of space available for user data. In addition, the numerical base used to calculate capacity (base 2 or base 10) also impacts sizing information. For these reasons, it is important to use the correct size measurement, depending on the task you want to accomplish:
  • For calculating overall system capacity, you use the physical capacity of the disk, and count every disk that is owned by the storage system.
  • For calculating how many disks you can put into an aggregate before you exceed its maximum size, you use the right-sized, or usable capacity of all data disks in that aggregate.
    Parity and dparity disks are not counted against the maximum aggregate size.

Using Disk Space Calculator

You can also calculate your raw and usable disk space using this software. Download Software
Also this includes a new feature called Raid Group Size Estimator where you key in disks values, raid type and disk type – the software will attempt to provide the best RG size values either based on NetApp recommendations or Optimal Capacity.(Please note: The Raid group size input in the calculator is only for disk space calculations and this is ignored for the raid group estimator)
I have developed this Raid Group Size Estimator based on many users request. As usual please provide feedback if you do some testing.

Screenshot of new version 2.1 (Software zip attached to this post)
Disk space calculator


Please provide your valuable comments


Qtrees

qtree

Netapp Qtree

Netapp Qtree is partition of the volume, same like unix directory. Using qtree we can apply quota management to disk space usage.
  • A qtree is similar like Directory
  • Using quota we can limit the qtree size.
  • Qtree represents the third level partitioned in the storage, Because aggregate conatin volumes and the volumes resides qtree.
  • Qtree have its own security style like NTFS, UNIX and MIXED

Creating qtree

creating an qtree is an very easy process use below command to create
Netapp01>qtree create testingqtree

Verify Qtree

verify the qtree using below command
Netapp01>qtree status

Rename Qtree

Netapp01>priv set advanced
Netapp01>qtree rename /vol/vol0/testingqtree /vol/vol0/qtree1
Netapp01>priv set

Deleting Qtree

Netapp01>priv set advanced
Netapp01>qtree delete -f /vol/vol0/qtree1
Netapp01>priv set

Qtree Security Style Modification

NTFS = Windows OS
UNIX = All unix Based OS
Mixed = both Unix and Windows

Syntax:
Netapp01> qtree security qtree_name [unix | Winows | mixed]
Example :
The security style of a qtree named qtree1 in the root volume to NTFS
Netapp01>  qtree security qtree1 ntfs
The security style of a qtree named test in the vol1 volume to NTFS
Netapp01>> qtree security /vol/vol1/test ntfs
The security style of the root volume to UNIX
Netapp01>> qtree security / unix
The security style of the vol1 volume to UNIX
Netapp01>  qtree security /vol/vol1/ unix
Netapp01 > qtree
Volume        Tree            Style              Oplocks     Status
——–       ——–             —–              ——–        ——–
vol0                                unix              enabled          normal
vol0            qtree1          ntfs               enabled          normal
vol1                               unix               enabled          normal
Let’s see the detailed explanation about Qtree

Data reallocation - Netapp Volumes and Aggregates


Understanding about volume and aggregate reallocation, one of the most misunderstood topics I have seen with NetApp FAS systems is reallocation.  There are two types of reallocation that can be run on these systems; one for files and volumes and another for aggregates.  The process is run in the background, and although the goal is to optimize placement of data blocks both serve a different purpose.  Below is a picture of a 4 disk aggregate with 2 volumes, one orange and one yellow.
Volume ReallocationIf we add a new disk to this aggregate, and we don’t run volume level reallocation all new writes will happen on the area in the aggregate that has the most contiguous free space.  As we can see from the picture below this area is the new disk.  Since new data is usually the most accessed data you now have this single disk servicing most of your reads and writes.  This will create a “hot disk”, and performance issues.
New writes in reallocation
Now if we run a volume reallocation on the yellow volume the data will be spread out across all the disks in the aggregate.  The orange volume is still unoptimized and will suffer from the hot disk syndrome until we run a reallocation on it as well.
after reallocationThis is why when adding only a few new disk to an aggregate you must run a volume reallocation against every volume in your aggregate.  If you are adding multiple disks to an aggregate (16, 32, etc) it may not be necessary to run the reallocate.  Imagine you add 32 disk to a 16 disk aggregate.  New writes will go to 32 disk instead of the 16 you had prior so performance will be much better without taking any intervention.  As the new disk begin to fill up writes will eventually hit all 48 disks in your aggregate.  You could of course speed this process up by running manual reallocation against all volumes in the aggregate.
The other big area of confusion is what an aggregate reallocation actually does.  Aggregate reallocation “reallocate -A” will only optimize free space in the aggregate.  This will help your system with writes as the easier it is to find contiguous free space the more efficient those operations will be.  Take the diagram below as an example of an aggregate that could benefit from reallocation.
before aggregate reallocationThis is our expanded aggregate that we only reallocated the yellow volume.  We see free space in the aggregate where the blocks were distributed across the other disk.  We also see how new writes for the orange volume stacked up on the new disk as that is where we had the most contiguous free space.  I wonder if the application owner has been complaining about performance issues with his orange data?  The picture below shows us what happens after the aggregate reallocate.
After aggregate Reallocation
We still have the unoptimized data from the volume we did not reallocate.  The only thing the aggregate reallocate did was make the free space in it more contiguous for writing new data.  It is easy to see how one could be confused by these similar but different processes, and  I hope this helps explain how and why you would use the different types of reallocation.
The smallest addressable block of data in Data ONTAP is 4k. However, all data is written to volumes in 256k chunks. When data block which is bigger than 256k comes in, filer searches for contiguous 256k of free space in the file system. If it’s found, data block is written into it, if not then filer splits the data block and puts it in several places. It’s called fragmentation and is familiar to everyone from the times, when FAT files ystems were in use. It’s not a big issue in modern file systems, like NTFS or WAFL, but defragmentation can help to solve performance problems in some situations.
In mostly random read/write environments (which is quite common these days) fragmentation has no impact on performance. If you write or read data from random places of the hard drive it doesn’t matter if this data is random or sequential on the physical media. NetApp recommends to consider defragmentation for the applications with sequential read type of workload:
  • Online transaction processing databases that perform large table scans
  • E-mail systems that use database storage with verification processes
  • Host-side backup of LUNs
Reallocation process uses thresholds values to represent the file system layout optimization level, where 4 is normal and everything bigger than 10 is not optimal.
To check the level of optimization for particular volume use:
> reallocate measure –o /vol/vol_name
If you decide to run reallocate on the volume, run:
> reallocate start –f /vol/vol_name
There are certain considerations if you’re using snapshots or deduplication on volumes. There is a “-p” option, to prevent inflating snapshots during reallocate. And from version 8.1 Data ONTAP also supports reallocation of deduplicated volumes.

Conclusion

When we add an disk to aggregate we have to reallocate the volumes to distribute the blocks. When we create volume and expanding volume better to run reallocation process to get good performance always.

Sunday, October 11, 2015

Thin provisioning and a Storage Over commitment

Thin provisioning and a Storage Over commitment

Thin provisioning is a very important feature on modern storage arrays.  Almost every storage vendor has this capability, but if you don’t over commit your storage you are missing the boat.  Lets start off at a a high level with what a traditional storage array looks like without thin provisioning.  In the diagram below we have two things; provisioned space and free space.
Thin provisioning
Once you start thin provisioning you introduce the concept of consumed space.  When you start caring about consumed space, instead of just provisioned space, free space (as defined above) is more aptly defined as unallocated space; since your actual free space is simply unused storage.  Below is the same array as above (8TB provisioned storage), but here we made everything thin, and of the 8TB we assigned there is only 2TB actually in use.  This leaves us with 8TB free on the array.
Thin provisioning 
It is pretty easy to see why thin provisioning is so great.  You could now use that extra 6TB of provisioned space to do something like storing more of your array based snapshots.  Of course we want to maximize the potential of our array and thin provisioning is the gateway drug to storage over commitment.  By over committing your storage you can provision more space than you actually have installed on your array.  In the diagram below we take the same array with 10TB of total usable storage and configure our attached systems to use a combined 14TB.
Over commitment 
Everything is now looking great.  You have added more storage to your system than you actually had available.  Your companies CFO might give you a hug when he sees all the money you saved the business!  Before you collect on that warm embrace be prepared for the next step; users start putting the storage to work, and you start running out of free space.
Over Comit Grow 
Now you are in the danger zone.  You only have 2TB of free space, but you have 6TB assigned to your systems.  This is where efficiency features on your storage arrays can come to the rescue.  Not all arrays are created equal so you may or may not have these features, but deduplication and compression are two of the most common.  When you use these features think of it like a trash compactor putting downward pressure on your consumed storage.  After all, the data you are compressing and deduplicating is trash anyway (duplicate and redundant data blocks that do not need to be stored).
Over Comit Effic 

This is going to seem contrary, but over committing your storage makes the most sense when you have a lot of storage (or at least a decent degree of excess).  When you decide to over commit you are working off the principal of shared risk.  The more storage you have the less risk there is to over commitment.  You certainly don’t have to have a lot storage to over commit, and using storage efficiency features can give you the buffer you need to feel comfortable.

Once you go down the over commitment path you need to manage it.  Monitor your consumed space vs provisioned space, setup automated alerts, and audit them regularly to make certain they work as expected.  Also make certain to monitor your performance.  When you start stacking up systems on your storage, even though you may now have the space, you still only have a certain number of IOPS.

Storage Over Commitment Guide
  1. Thin provision your volumes and LUNs
  2. Over provision your storage to drive up storage array utilization
  3. Make sure you have a good amount of buffer storage before you over commit
  4. Pro-actively monitor your space consumed vs space provisioned.
  5. Use storage efficiency features to reclaim consumed space
  6. Make sure you don’t over commit your performance

Please write your feedback below…

Understanding about Volume and Aggregate reallocation

Understanding about volume and aggregate reallocation

understanding about volume and aggregate reallocation, one of the most misunderstood topics I have seen with NetApp FAS systems is reallocation.  There are two types of reallocation that can be run on these systems; one for files and volumes and another for aggregates.  The process is run in the background, and although the goal is to optimize placement of data blocks both serve a different purpose.  Below is a picture of a 4 disk aggregate with 2 volumes, one orange and one yellow.
Volume ReallocationIf we add a new disk to this aggregate, and we don’t run volume level reallocation all new writes will happen on the area in the aggregate that has the most contiguous free space.  As we can see from the picture below this area is the new disk.  Since new data is usually the most accessed data you now have this single disk servicing most of your reads and writes.  This will create a “hot disk”, and performance issues.
New writes in reallocation
Now if we run a volume reallocation on the yellow volume the data will be spread out across all the disks in the aggregate.  The orange volume is still unoptimized and will suffer from the hot disk syndrome until we run a reallocation on it as well.
after reallocationThis is why when adding only a few new disk to an aggregate you must run a volume reallocation against every volume in your aggregate.  If you are adding multiple disks to an aggregate (16, 32, etc) it may not be necessary to run the reallocate.  Imagine you add 32 disk to a 16 disk aggregate.  New writes will go to 32 disk instead of the 16 you had prior so performance will be much better without taking any intervention.  As the new disk begin to fill up writes will eventually hit all 48 disks in your aggregate.  You could of course speed this process up by running manual reallocation against all volumes in the aggregate.
The other big area of confusion is what an aggregate reallocation actually does.  Aggregate reallocation “reallocate -A” will only optimize free space in the aggregate.  This will help your system with writes as the easier it is to find contiguous free space the more efficient those operations will be.  Take the diagram below as an example of an aggregate that could benefit from reallocation.
before aggregate reallocationThis is our expanded aggregate that we only reallocated the yellow volume.  We see free space in the aggregate where the blocks were distributed across the other disk.  We also see how new writes for the orange volume stacked up on the new disk as that is where we had the most contiguous free space.  I wonder if the application owner has been complaining about performance issues with his orange data?  The picture below shows us what happens after the aggregate reallocate.
After aggregate Reallocation
We still have the unoptimized data from the volume we did not reallocate.  The only thing the aggregate reallocate did was make the free space in it more contiguous for writing new data.  It is easy to see how one could be confused by these similar but different processes, and  I hope this helps explain how and why you would use the different types of reallocation.

The smallest addressable block of data in Data ONTAP is 4k. However, all data is written to volumes in 256k chunks. When data block which is bigger than 256k comes in, filer searches for contiguous 256k of free space in the file system. If it’s found, data block is written into it, if not then filer splits the data block and puts it in several places. It’s called fragmentation and is familiar to everyone from the times, when FAT files ystems were in use. It’s not a big issue in modern file systems, like NTFS or WAFL, but defragmentation can help to solve performance problems in some situations.
In mostly random read/write environments (which is quite common these days) fragmentation has no impact on performance. If you write or read data from random places of the hard drive it doesn’t matter if this data is random or sequential on the physical media. NetApp recommends to consider defragmentation for the applications with sequential read type of workload:
  • Online transaction processing databases that perform large table scans
  • E-mail systems that use database storage with verification processes
  • Host-side backup of LUNs
Reallocation process uses thresholds values to represent the file system layout optimization level, where 4 is normal and everything bigger than 10 is not optimal.

To check the level of optimization for particular volume use:
> reallocate measure –o /vol/vol_name
If you decide to run reallocate on the volume, run:
> reallocate start –f /vol/vol_name
There are certain considerations if you’re using snapshots or deduplication on volumes. There is a “-p” option, to prevent inflating snapshots during reallocate. And from version 8.1 Data ONTAP also supports reallocation of deduplicated volumes.

Conclusion

When we add an disk to aggregate we have to reallocate the volumes to distribute the blocks. When we create volume and expanding volume better to run reallocation process to get good performance always.

What is an Aggregate - Netapp

what is aggregate NetApp

Aggregates are the raw space in your storage system.  you take a bunch of individual disks and aggregate them together into aggregates.  But, an aggregate can’t actually hold data, its just raw space.  you then layer on partitions, which in NetApp land are called volumes.  the volumes hold the data.

what is aggregate NetApp. You make aggregates for various reasons.  For example:
performance boundaries – a disk can only be in one aggregate.  so each aggregate has its own discreet drives.  this lets us tune the performance of the aggregate by adding in however many spindles we need to achieve the type of performance we want.  This is kind of skewed by having Flash Cache cards and such, but its still roughly correct.
Shared Space boundary – All volumes in an aggregate share the hard drives in that aggregate.  there is no way to prevent the volumes in an aggregate from mixing their data on the same drives

Introduction to 32bit and 64bit aggregate

Aggregates are either 64-bit or 32-bit format. 64-bit aggregates have much larger size limits than 32-bit aggregates. 64-bit and 32-bit aggregates can coexist on the same storage system.


32-bit aggregates have a maximum size of 16 TB; 64-bit aggregates’ maximum size depends on the storage system model. For the maximum 64-bit aggregate size of your storage system model.


When you create a new aggregate, it is a 64-bit format aggregate.


You can expand 32-bit aggregates to 64-bit aggregates by increasing their size beyond 16 TB. 64-bit aggregates, including aggregates that were previously expanded, cannot be converted to 32-bit aggregates.


You can see whether an aggregate is a 32-bit aggregate or a 64-bit aggregate by using the aggr status command.


Using Netapp CLI

Using Command Line Interface – Netapp

The Data ONTAP CLI is a command language interpreter that executes commands from the Data ONTAP console. You can access the console with a physical connection, through telnet, or through the Remote LAN Manager (RLM). The commands can also be executed using rsh and ssh protocols. You can concatenate commands together on the same line by separating the commands with semi-colons, (;).
Using command Line interface – Netapp. The quoting rules in the Data ONTAP CLI are unusual. There is no escape character like the backslash;

however there are the following special characters:

& (ampersand)     – Unicode indicator
# (pound sign)    – comment indicator
; (semicolon)     – command separator
’ (single quote)  – parameter wrapper
” (double quote)  – parameter wrapper
(space)         – parameter separator
(tab)           – parameter separator

? (question mark) – for command help

When special characters are part of a command argument, the argument needs to be surrounded by quotes or the character will be treated as a special character. A single quote character needs to be surrounded by double quote characters and a double quote character needs to be surrounded by single quote characters. The other special characters can be surrounded by either single or double quotes.

EXAMPLES
The following examples show quote usage:
qtree create /vol/test_vol/’qtree1’
The qtree qtree 1 is created.
qtree create /vol/test_vol/’qtree#1’
The qtree qtree#1 is created.
qtree create /vol/test_vol/”qtree’1″
The qtree qtree’1 is created.
qtree create /vol/test_vol/’hello”’”’”1


Sunday, October 4, 2015

Netapp GUI Managment Tools - NCSA

1. Oncommand System Manager

  • Improve storage and service efficiency for individual storage systems and clusters of systems.
  • Guide users through system configuration and ongoing administration with wizards and graphics.
  • Eliminate the need for storage expertise with an intuitive interface for managing NetApp storage.
  • Leverage powerful Data ONTAP and clustered Data ONTAP features with an easy-to-use graphical user interface.
  • Improve your return on investment. System Manager is included without charge with the purchase of NetApp FAS storage hardware, including systems running FlexArray storage virtualization software.

2.  OnCommand Unified Manager

Gain a new level of control over your shared storage infrastructure. NetApp OnCommand data management software gives you the visibility you need to achieve common data management across resources in the Data Fabric.

3. OnCommand Workflow Automation

Improve productivity in your organization by automating repeatable manual storage-management processes.
  • Provision, clone, migrate or decommission storage for databases or file systems.
  • Set up a new visualization environment, including a storage switch or datastore.
  • Set up virtual or cloud storage for an application as part of an end-to-end orchestration process.
  • Set up FlexPod for virtual desktops.
  • Perform storage cloning.
  • Conduct a centralized NetApp SnapManager software activation.
  • Enable self-service, storage as a service, and more with faster delivery of new standard and custom storage services.
  • Deploy Software Defined Storage (SDS) for your Software Defined Data Center (SDDC).
  • OnCommand Workflow Automation enables one-click automation and deployment of applications, including VMware (PDF), Oracle, Microsoft, SAP, Citrix, and others. Reduce the cost of your storage management while enabling the use of best practices – choose OnCommand Workflow Automation.

4. Performance Manager

Specifically designed to deliver performance monitoring capabilities in OnCommand Unified Manager for clustered Data ONTAP 8.2 and beyond, OnCommand Performance Manager provides storage administrators with a wealth of clustered Data ONTAP information. This includes comprehensive data storage performance troubleshooting, isolating potential problems and offering concrete solutions to performance issues based on its system analysis.

5. OnCommand Insight

Optimize storage resources and investments in your hybrid cloud environment. NetApp OnCommand Insight storage resource-management tools provide you with a cross-domain view of performance metrics, including application performance, datastore performance, virtual machine performance and storage infrastructure performance. OnCommand Insight analyses tier assignments and lets you load-balance your entire application portfolio across the storage fabric.

Lets see the detailed explanation about above tools